Total Pageviews

Monday, 20 January 2014

Finishing off my Kasrkin squads

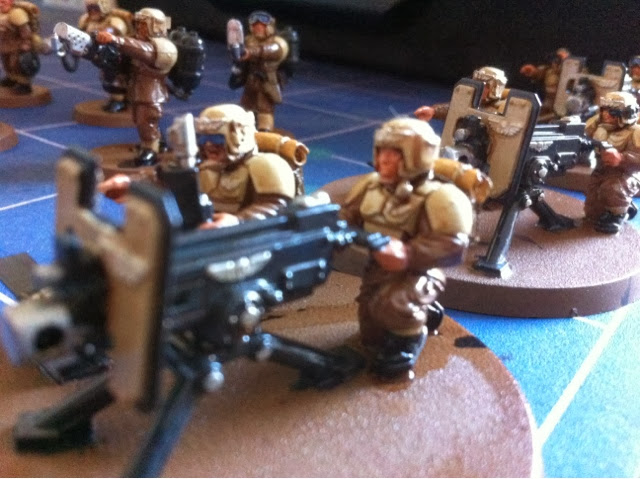
So the next thing that's on my painting list are these
I was able to dig out 2 squads of kasrkins 
Iv still got to dugg out three or 4 models out of my garage but I have primed and started work on most of them.
Il be using the same colours as I have with my normal guard troops but I might experiment with some desert style camo patterns so that they stand out abit from normal troops
I still love these miniatures as there sculpts are great and there extra armour dos make them stand out.

Sunday, 19 January 2014

Using oil wash

So tragedy struck today when I discovered Iv miss placed my army painter dip :(
And as it was the only day I had to sit down and get some painting done I decided to try something different.
I decided to use an oil wash on my guard as I had done this before but only on smaller projects I thought this would be a test/ trial :0.
Well these are the products I used after doing abit of research on YouTube and google 
1. Oil paint
This is just a standard brown from my local art/ craft shop
2. Thinner/ mineral spirits 
 This is actually mineral spirits although it says whit spirits on the bottle, there is a small "mineral spirits" at the bottom.

So first I had to prep my miniatures, this ment coating them all with a coat of Vallejo gloss varnish that I ran through my airbrush slightly thinned down with a drop of water on a 4:1 ratio of varnish to water.
Once dried I mixed up the oil wash all I did was a pee size drop to two cap dulls of mineral spirits, mixed with an old brush in an old jam jar and once mixed I dropped abit onto some kitchen cloth to see how it dispersed 
 As long as it is soaked up but the kitchen cloth this is an indicator of how thin it is and how well mixed your oil paint/ thinner is.
Then using a wash size brush I applied it to my miniatures endearing a good coverage and that it was not pooling in any unwanted places.
I allied it to dry in a warm room for about 3 hours then with a cotton bud and a small amount of mineral spirits I cleaned ip all the top surfaces gently wiping away the excess, ensure your not to rough when doing this as the gloss varnish is there to protect the underlying paint from the thinner but if you press to hard you might run the risk of stripping the paint away.
Once I was happy that I had cleaned away all the unwanted oil was from the top/ raised surfaces I simply slowed the miniatures to dry for another hour the sealed them with a cost of Vallejo matt varnish.
Overall I'm very happy with this effect and think with abit more practice this will be how I was all my miniatures in the future.

Monday, 6 January 2014

Guard almost ready to dip

So this has been a project that I was putting off for almost a year but now it seems like there is light at the end of the tunnel, yesterday I was able to sit down for half the day and churned out abit more work.
So as you will be able to see I'm not that far way from having my army ready to dip,
All I need todo is all the silver and white and a few splashes of colour and I'm ready
I will need to do a couple of other miniatures but there still in the post but this is the main bulk of my guard army less my rough riders and ogrins. 

Little bit more done

So with christmas and new year out of the way I made my January painting challenge to finish these guard off. 
I dug out my brushes and got some more work done

Just need todo the flesh, hair, silver and ponchos and then there ready to dip

Thursday, 2 January 2014

More work on my army

Well it's been a few months since my last post and I'm sorry but will leaving the army and finding a new job and getting settled as well as a few big painting commissions I had to put my guard to one side.
But now Iv turned my attention back to them and I have finally decided on a colour pattern for them, so hear are a few pics of the progress so far
I'm sorry about the picture quality but it was getting late.
I'm block painting the colours in as my intention is to DIP them using the Army Painter Dip.
As soon as I have them ready to DIP il post some more pics

Wednesday, 14 August 2013

First bit of paint

So I took the plunge and decided to base colour my guard :/

As my airbrush is being cleaned at the moment and not wanting to wait I've gone for the use of a coloured primer as its an easy option
I've gone for leather brown as this is roughly the base colour I was after and I had a can sat about.
 Again abit sunny today so my pics seem grey/ light.
As you can see the army painter spray covers well, it didn't pool in any places or spatter and settled well giving a good surface finish
There is plenty of detail left and I'm now going to do a couple of test to decide on the colour of the armour plates and what shade I should use to highlight the uniform  

Tuesday, 13 August 2013

The other stuff

So why has it taken over a year to get the guard army started?
Well I moved house twice got married and had a lot on in work and there were other painting bits like these
These are a current bit of work and not quite finished :)
Had a dabble in dystopian wars :)
Painted a lot of saga bits for fleebay :)
And for my friend Dave at WarGameStore 
Still chipping away with my vampire counts army but 90 zombies are TOTALY finished along with 75 skeleton warriors :)
Painted a lot of fames of war for me and for friends
Dipped a lot of FOW too :)
And got into bolt action :)

And along with all this 

Had major stomach operation
Got married
Got an asbo cat
Got a silly dog
And in 5 months this little person will arrive :)

So I've had a good excuse to put the project to one side but now it's seems like a good chance to kick start it into life and get it going :)

To Dip or not to Dip

So as I'm getting ready to start painting my new army I'm finding myself torn on the decision "should I dip them?"
 I've used the Army Painter dip loads of times now with great effect on 15mm upto 28mm but most of it has been rank and file so lots of models with little detail.

 I find the army painter primers are very good, both value and quality and come in a good selection from white and black primer through a decent selection of colours that match both 40k like blood angels, space wolfs and ultra marines all the way through to German grey for FOW or Bolt Action.


The dips come in three shades 
Soft tone.
Strong tone.
Dark tone.
Although there are a fantastic product and will deliver fantastic results for a decent painter it can feel like you are cheating or being lazy.

So this is my conundrum, do I make my life easy and just dip or do I put the effort in and paint my guard and use the standard method and take my time and build up the layers of paint and apply washes and highlights?

                           Or

Do I venture into that dark dark mysterious world of

Oil washes!!!!!!!!!!!!!!!!!!

The start

So after two days of clipping sanding and gluing this is what I have
(Sorry about the pic, very sunny today)

HQ with creed and kell 

7 rough riders 

Veteran platoon x3

As you can see the FW kits I used are old  you can tell this by the colour of the resin, I've mainly used the FW heads and helmets and backpacks to add a small theme and when I can model each guardsman without a helmet but ensuring one is attached to the left side.

Each Sgt or Nco has a peaked forage cap so I can again add a small theme.

I've decided to make sure each squad has a heavy weapons team and also decided all three of my veteran squads will have heavy bolters again adding a theme to my army. Any addition weapons teams will have other heavy weapons but il have to sit down and dig through all the othe bits I have and see what I can make up.

So for now this is my guard

Il be working on the paint scheme later today and once I've decided ill get cracking with it.

Thanks for reading

Fear naught

The Guard Will Rise

After a break away from 40k for over a year (sorry) I've decided to build my guard army, or should I say re build after a insurance claim for an old guard army that was lost had now been settled (one for one) I've not really got any excuse for not building it.
This time I've decided to try and make it look different without slapping tones of green stuff and doing daft conversions.
I've used some old forge world IG conversion kits that I've had sat about since 2004-5 is and some rough riders that I've had since 1991.
I'm going to run it with veterans mounted in transport and try to have it as manoeuvrable as possible, and avoid rank and file and mass numbers.
The paint scheme will be slightly different to what I was going todo as I want them to stand out slightly without being OTT.

Again sorry for the delay and for not posting but please keep an eye open on this and do follow my progress :)

Saturday, 10 September 2011

Imperial Guard Leman Russ

After trying my paint scheme out on a few guard miniature i thought i would try it out on a tank, and as you all know the back bone of any Guard army is the Leman Russ battle tank.
so after i Doug one out i thought i would see if the army painter skull bone would be able to cover the already painted Leman Russ which had been under coated with chaos black and then painted with Dark angels green.

this is how it turned out with one coat!

As you can see it came out better than i thought :)

so after this good result i set about painting all the silver bits.


after this i tried the same wash process i used on the other miniatures, using Devlin Mud and Badda Black.
this is were it went abit wrong, after about three hours of trying to avoid brush stroke and pooling it wasn't going so well. after trying everything i could think to do nothing seemed to work. even asking the advice from dave at www.wargamestore.com.
It got to the point were i thought i would have to re spray it and start again, so i got the army painter spray can out and then thought i would try and scrub off some of the paint with some warm water and a nail brush.
after about three minutes of scrubbing gently i ran the model under the tap to rinse it abit and to see what had come off and i was amazed to see this.

I don't know how this has happened but it seemed to have weathered the tank brilliantly and given it the rough battle hardened look i was after. so once i get the time next week i will add the detail to the rest of it.